In today's world, where temperature control is essential for our comfort and productivity, mini-split air conditioning systems have become increasingly popular due to their efficiency and versatility. However, like any mechanical system, mini-split AC units may require maintenance from time to time to ensure optimal performance. One such maintenance task is adding refrigerant, often referred to as "freon," to the system. If you find yourself needing to add refrigerant to your mini-split AC, this step-by-step guide will walk you through the process.
Step 1: Safety First
Before you begin any maintenance tasks on your mini-split AC, it's crucial to prioritize safety. Make sure to turn off the power to the unit to prevent any electrical accidents. Additionally, wear proper protective gear such as gloves and safety goggles to avoid contact with refrigerant and any other potentially harmful materials.
Step 2: Determine Refrigerant Type
Identify the type of refrigerant your mini-split AC uses. Older systems may use R-22 refrigerant, while newer models typically use R-410A or other more environmentally friendly alternatives. This information is crucial as the procedures for handling different refrigerants can vary.
Step 3: Check for Leaks
If you're experiencing cooling issues with your mini-split AC, it's important to rule out any refrigerant leaks before adding more refrigerant. Leaks can significantly impact the efficiency of your system and should be addressed before topping off the refrigerant. Look for visible signs of oil or refrigerant stains around the unit or refrigerant lines.
Step 4: Gather the Necessary Tools
To add refrigerant to your mini-split AC, you'll need a few tools and equipment, including:
Refrigerant cylinders with the appropriate type of refrigerant
Charging hoses and manifold gauge set
Screwdrivers and wrenches
Leak detection tools (if necessary)
Safety goggles, gloves, and protective clothing
Step 5: Connect the Charging Hoses
Attach the charging hoses of the manifold gauge set to the service ports on the mini-split AC. The service ports are typically located on the refrigerant lines. Connect the blue hose to the low-pressure service port and the red hose to the high-pressure service port. The yellow hose should be attached to the refrigerant cylinder.
Step 6: Purge the Hoses
Before connecting the refrigerant cylinder to the manifold gauge set, make sure to purge the hoses of any air. This is important to ensure accurate readings and prevent air from entering the system.
Step 7: Attach the Refrigerant Cylinder
Connect the refrigerant cylinder to the yellow hose of the manifold gauge set. Ensure that the cylinder valve is closed before attaching it to the hose.
Step 8: Open the Valves
Slowly open the valves on both the low-pressure and high-pressure sides of the manifold gauge set. This will allow the refrigerant to flow into the system. Pay attention to the pressure readings on the gauges as you add refrigerant.
Step 9: Monitor and Adjust
As you add refrigerant, monitor the pressure readings on the gauges. Refer to the manufacturer's specifications for the correct pressure ranges for your specific mini-split AC model. Be cautious not to overcharge the system, as this can lead to performance issues and potential damage.
Step 10: Close Valves and Disconnect
Once you've achieved the desired pressure levels, close the valves on the manifold gauge set. Disconnect the refrigerant cylinder from the charging hoses and store it properly.
Step 11: Test the System
Turn on the mini-split AC and allow it to run for a while. Feel the air coming from the unit's vents to ensure that it's cooling properly. Monitor the temperature and performance over the next few hours to confirm that the added refrigerant has improved the cooling efficiency.
Step 12: Document and Inspect
Keep a record of the refrigerant added, pressure levels, and any other relevant information. If you continue to experience cooling issues, it may be advisable to contact a professional HVAC technician to further inspect and address any underlying problems.
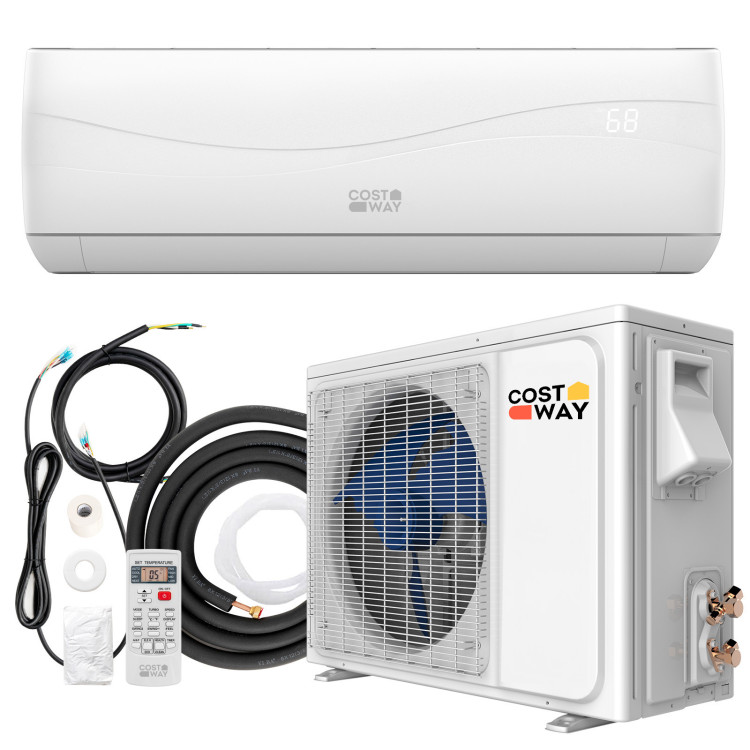
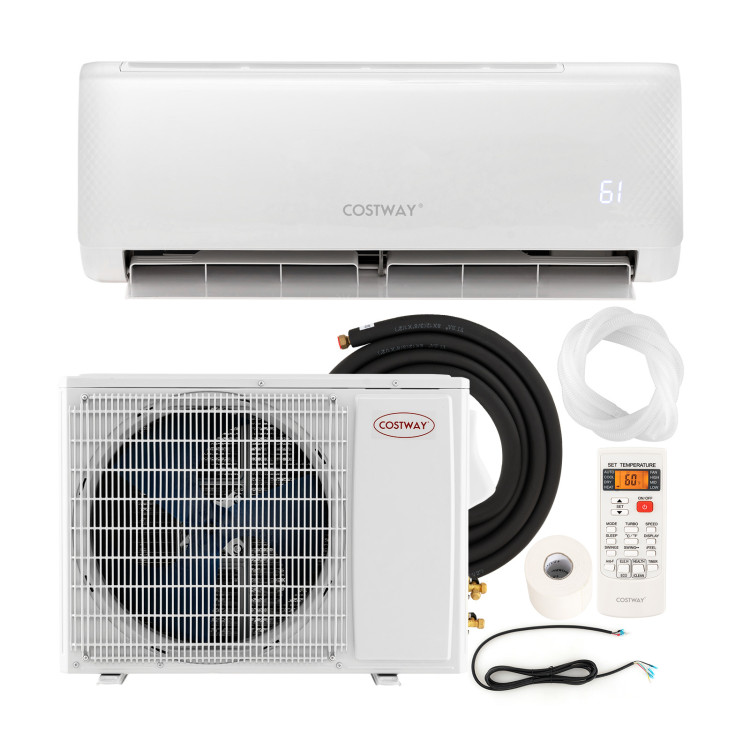
Discover the Costway Split Air Conditioner
As you explore options to ensure a comfortable indoor environment, consider the Costway Split Air Conditioner. This exceptional unit comes with an impressive 8-year warranty, offering you peace of mind for years to come. With its powerful cooling effect and whisper-quiet operation, the Costway Split Air Conditioner stands out as a reliable choice for maintaining a comfortable living space.

Adding refrigerant to your mini-split air conditioner doesn't have to be a daunting task. By following the steps outlined in this guide and considering options like the Costway Split Air Conditioner, you can enjoy a cooler, more comfortable home environment throughout the summer months. Remember, if you're uncertain about any aspect of the process, don't hesitate to seek the guidance of a professional HVAC technician to ensure optimal results.